Here are some facts and history about Circuit of the Americas (COTA):
- Location: COTA is located in Austin, Texas, USA, and is a state-of-the-art motorsport facility.
- Inauguration: The circuit officially opened in 2012 and hosted its first Formula 1 race, the United States Grand Prix, in the same year.
- Design: The circuit was designed by German architect Hermann Tilke, known for creating several modern F1 circuits. It incorporates elements inspired by famous corners from other tracks, such as Silverstone’s Maggotts-Becketts sequence and Istanbul Park’s Turn 8.
- Length and Layout: The track is 5.513 kilometers (3.426 miles) long with 20 corners, featuring a mix of high-speed straights, technical corners, and significant elevation changes.
- Signature Features:
- Turn 1: Known for its steep uphill approach, Turn 1 is a wide hairpin with multiple racing lines, making it a prime overtaking spot.
- The Esses: Turns 3-9 form a high-speed sequence reminiscent of Silverstone’s Maggotts-Becketts.
- The Tower: A 251-foot observation tower provides panoramic views of the track and surrounding area.
- Elevation Change: The circuit has a total elevation change of 41 meters (135 feet), with the climb to Turn 1 being the most dramatic.
- Other Events: In addition to Formula 1, COTA hosts MotoGP, the World Endurance Championship, IndyCar, and various music and cultural events.
- Sustainability: COTA has implemented various sustainability initiatives, including solar panels and water reclamation systems, to minimize its environmental impact.
- Seating Capacity: The venue can accommodate over 120,000 spectators, making it one of the largest sporting facilities in the region.
- Notable Moments:
- In 2018, Lewis Hamilton clinched his fifth Formula 1 World Championship at COTA.
- The circuit has seen dramatic races, including wet-weather events and last-lap battles.
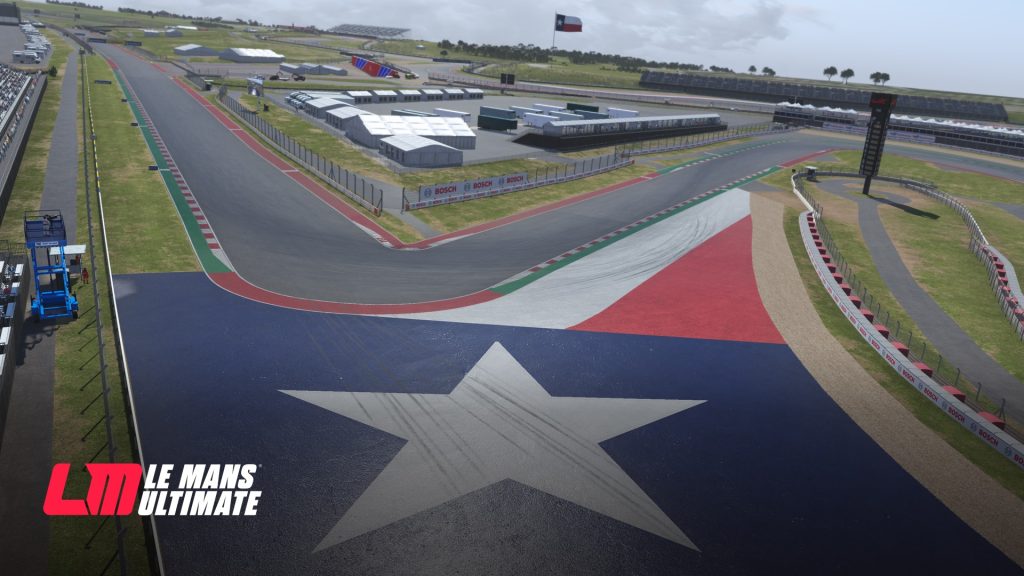
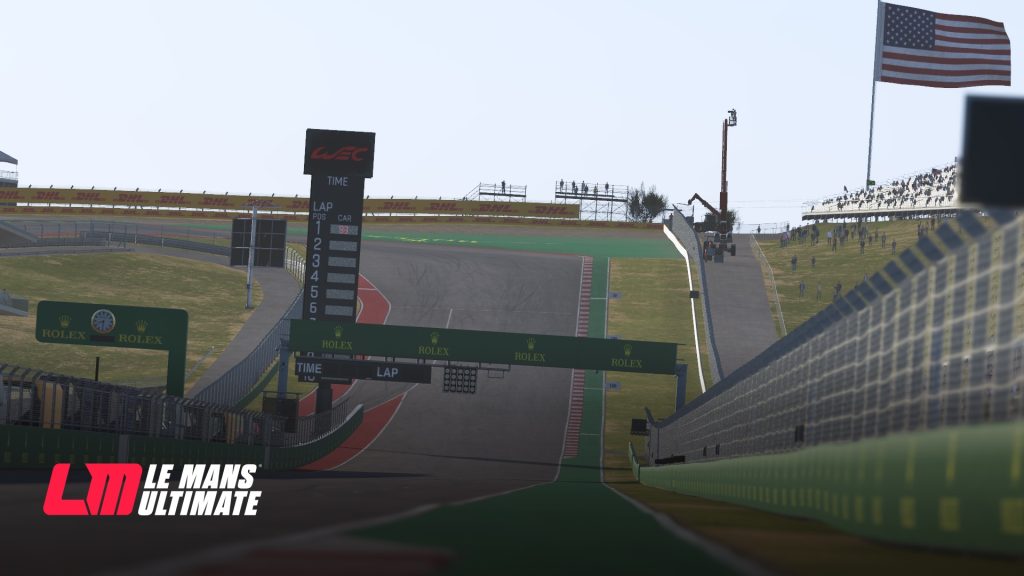
Turn 1 (Big Red)
Turn 1 at Circuit of the Americas is one of the most distinctive and challenging corners on the track, demanding precision in braking, positioning, and throttle control.
As you approach Turn 1, you’ll be climbing a steep incline, which significantly reduces the braking distance. Coming down the main straight, look far ahead and spot your braking marker. Your braking marker is the 100m board but keep in mind that the hill will compress your braking zone. Brake hard initially and trail brake all the way into your apex. You’ll want to be in 1st or 2nd gear as you reach the top.
Position your car on the far right side of the track to open up the corner as much as possible. Turn-in is earlier than you think because of the gradient, you’re cresting the hill just as you hit the apex. The apex itself is blind at first, so commit to your line and hug the inside kerb tightly. Avoid climbing too high on the kerb, as it can unsettle the car and cost you exit speed.
As you start to descend, progressively open up your steering and apply the throttle progressively. Watch the camber on the exit, which helps rotate the car, but be prepared for a slight drop-off as you clear the apex. As you get back to full power let the car run out to the exit kerb using as much of the exit that is allowed. Keep at least 2 wheels on the red and white kerbing to avoid track limits.
Turn 2
Turn 2 at COTA is a sweeping, high-speed right-hand kink that sets you up for the complex series of esses that follow.
As you exit Turn 1, let the car flow naturally to the left side of the track, positioning yourself for a clean run into Turn 2. Keep the throttle pinned, as T2 is flat-out. Avoid turning in too early; aim to position the car closer to the middle of the road. This midline approach gives you a better entry angle for Turn 3, which is crucial for carrying speed through the upcoming esses.
T2 has minimal kerbing on the inside which allows you to cut it, however aim to keep 2 wheels inside the white line to avoid track limits. Focus on keeping the car stable and balanced, and start preparing mentally for the precise braking needed as you approach Turn 3.
The exit of Turn 2 sets you up for the fast transitions ahead, so keep a smooth, steady line to maximize your entry speed into the next section.
Turns 3,4,5 and 6 (The Esses)
Turns 3 through 6 make up COTA’s high-speed “esses,” where precision and rhythm are everything. This sequence is a test of balance, commitment, and exact placement, with each turn setting up the next.
Coming out of Turn 2, aim the car towards the left side of the track to cut the left-hand short apex of T3 which sets up the more important T4 which is sweeping right-hander. As you approach T3, keep focusing ahead to position the car correctly. Go flat through T3 and make sure to stay more left to set up the entry of T4. Brake lightly and carry 4th gear into turn 4, using only slight steering input to keep the car stable. Aim to come as close to the inside curb as possible, but be wary of the track limits here, there’s a solid white line defining the boundary. You must keep at least two wheels inside this line, anything more will result in a track limits warning.
Quickly transfer the car over to the left in preparation for Turn 5, a left-hand sweep. Balance is key here. Keep trail braking and shift down to 3rd gear. Let the car flow as you adjust your line, aiming once again to keep two wheels inside the white line to stay within track limits. This flow sets you up for the tightening double apex right hand bend of Turn 6.
Turn 6 demands another precise entry. Keep the car in 3rd gear with enough throttle to carry the momentum and stabilise the car. Timing is crucial here—too much speed or an incorrect line will unsettle the car, making Turn 6 difficult to execute cleanly. The inside curb here is accessible, so use as much as is allowed on the first part as you transition to some more trail braking. The car will naturally drift away from the inside kerb and this is where a little bit of patience is required. Let the car rotate and aim to get back to the inside kerb for the 2nd apex. Get your inside wheels back over the inside kerb and try to keep right on the exit to open up the entry of T7.
Through this entire sequence, your priority is maintaining two wheels inside the white line at all times, as track limits are rigorously enforced. Finding a rhythm and building up speed with each lap will help you maximize the esses, setting you up well for the braking zone into Turn 7.
Turn 7
Turn 7 is a medium-speed left-hander that requires a disciplined approach to balance entry speed and exit precision. Coming out of the Esses, stay on the right side of the track to set up for a clean entry. You’ll typically be in 3rd or 4th gear, depending on your setup and how aggressively you exit Turn 6.
As you approach, look for the orange stacked tyres next to the guardrail on the right as your braking reference, but be ready to adjust slightly based on your tyre grip and the fuel load. Apply moderate braking and trail brake as you turn in, aiming for a mid-to-late apex. Position the car close to the inside kerb without riding over it, as the kerb here is flat but can still upset the car’s balance if taken too aggressively.
As you reach the apex, begin to unwind the steering and smoothly apply the throttle. Let the car drift out with your momentum but please make sure to not drift too wide which will make it easier for you to enter turn 8. Getting back on the power early is crucial here, as Turn 8 approaches quickly, and maintaining your momentum through Turn 7 will set you up for a clean entry into the following sequence.
Turn 8 and 9
Turn 8 is an uphill medium-speed right-hander that feeds into a short apex left-hander of turn 9. It’s a technical set of corners that lead onto a straight and into a hard braking zone into the hairpin at Turn 11. A good exit out of T9 can set up an overtake into T11.
You will be quickly met with T8 and you exit T7. Try positioning the car so that you are middle to right-hand side of the track. Look for where the red and white kerbing ends on the right-hand side before the corner. This is your braking reference. It is not a hard braking zone but rather all about slowing the car down enough to make the corner without compromising mid-corner momentum. Use the engine braking as you shift down to 2nd gear to assist with slowing down the car and helping with rotation.
Turn in early and keep the car tight to the inside kerbing. Use the red astroturf on the inside while keeping at least 2 wheels inside the white line. Continue to hug the inside and start to apply throttle to keep your momentum up. As the car starts to leave the inside kerb gets back to full throttle but watch out for oversteer. You want to be super smooth with your inputs to make sure you open up the entry for T9. If you have done T8 correctly you should be able just about to take T9 flat out.
Use the inside kerb of T9 to straighten your exit. You might still need to modulate the throttle depending on the car you are driving. The car will naturally want to understeer on the exit and you near the crest of the hill. Control the car with the throttle and steering to avoid running wide on the exit and invalidating your lap.
Turn 10
A slight left downhill bend that is easily taken flat out. Keep your steering inputs smooth and use the striped kerb on the inside to shorten your run down to the Turn 11 hairpin.
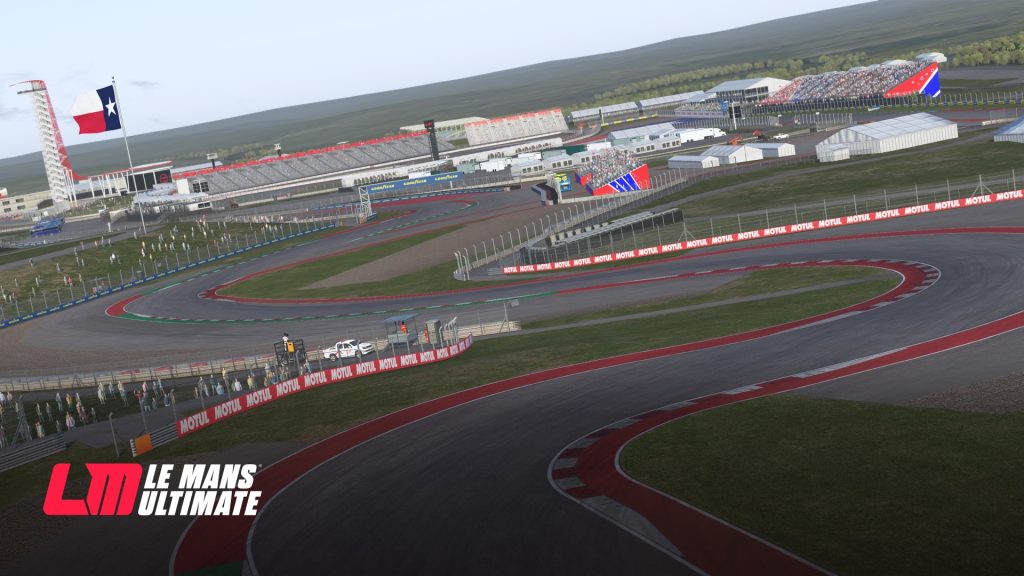
Turn 11
Turn 11 is a tight left-hand hairpin that leads on the long back straight. It’s a good overtaking opportunity as well as a good place to set up a potential overtake on the run down to Turn 12.
Position the car all the way to the right side of the track as you approach this slow hairpin. Your braking point is around the 2nd Motul board on the right-hand side. Use the red and white kerbing with your outside wheels to open up the entry of the corner. Brake hard initially and maximise the engine braking by shifting quickly down to 2nd gear. Use trail braking to keep the car balanced to help rotation as you aim for the inside apex. Your turning point is about a car length before the red and white kerbing ends on the right-hand side. Turn in gently while aiming for a late apex. At the Apex do not hit the inside sausage kerb as this will unsettle the car and cost you valuable lap time. The late apex allows you to get onto the throttle smoothly and progressively.
The exit is critical here, so focus on getting back on the throttle cleanly. Open up the steering as you unwind to maximize traction, keeping the car positioned to the left for the long back straight ahead.
Turn 12
Turn 12 is a tight left hand hairpin. It is a great overtaking spot in race situations.
Heading down the back straight stay to the right-hand side. Due to the high speeds, it can be quite tricky to spot your braking marker, so make sure to keep your focus far ahead.
Look out for the 3rd Michelin board on the right-hand side. Break hard initially to maximize the grip on the tyres while in a straight line. To help with additional braking use the gears, going down from sixth to second gear quickly.
Make sure to trail bake as you try to spot your turning-in point which is about a car length after the last Michelin board on the right. Turn in progressively and aim to get your inside wheels over the inside kerb as it dips away.
Progressively get back onto the power after the curb to prevent TC intervention. Open up the steering and let the car run out wide to use the exit kerbing available. Once the car has settled, immediately bring it back over to the left hand side to set up the sequence starting with Turn 13.
Turn 13,14 and 15
Turn 13 kicks off a tricky sequence of slow/medium speed corners that are off-cambered and easy to make mistakes on. Patience and good references are key in this sequence as it is much easier to lose time rather than gain it here.
Entering T13 stay to the left-hand side. Spot your braking point which is where the last horizontal white line meets the edge of the red and white kerbing on the outside. Brake gently and gear down to 2nd. Turn in so that you aim to get your inside wheels over the inside sausage kerb while keeping your outside wheels within the solid white line.
Be patient when getting back on the throttle as you need to keep turning to the right for the next right-hand turn which is slightly faster. Modulate the throttle initially if needed and aim to get your inside wheels over the red and white kerbing on the inside.
Passing through T14 keep your eyes focused on the entry for Turn 15. Shift up to 3rd gear and start to move back over to the right to open up the entry for the technical and tight left-hander.
Try to get as far right as possible and aim to brake a car length before the grass switches to gravel on the right-hand side. Brake gently and gear down to 2nd. Be patient and wait for your turning point. It’s tough to gauge but aim for a late apex so that you can straighten the car quickly to maximise the exit.
Get as tight onto the red and white kerbing as possible for the apex and get back onto the power more on the aggressive side if you have caught the late apex. This will gain you lots of time.

Turn 16,17 and 18
Next up is the triple-apex right-hand sequence which is one of the most demanding sections of the lap. The speed you can carry into here is very dependent on the class of car you are driving. The aero cars will handle this much better than the LMGT3’s.
Approach from the left and stay flat out for the first right-hander. Just as you pass the first apex, gently lift as you turn in for the 2nd apex, all while aiming for that 3rd and last apex which is the most important. Between the 2nd and 3rd apex gradually increase your throttle input as you approach the apex of T18. Keep the car stable and be smooth with your steering. Use all the available track on exit, but avoid running too wide as this can compromise your entry to T19.
Turn 19
A fast left-hander requiring precision. Position the car on the right side of the track and lift slightly or brake lightly depending on your car’s setup. Aim for the apex curb, but avoid using too much of it to maintain stability. Get back on the throttle early and smoothly, using all the track on exit. Track limits are very easy to exceed here so make sure to keep at least 2 wheels inside the white line.
Turn 20
The final corner is a slow left-hander that leads onto the main straight. Brake just before the solid white line that runs across the track, shifting down to 2nd gear. Hug the inside curb without climbing it, and focus on getting a strong exit to carry speed onto the straight. Use all of the track on exit, keeping at least two wheels within the white line. This will give a strong finish to round off the lap.
With that comes the end of our track guide for COTA.